
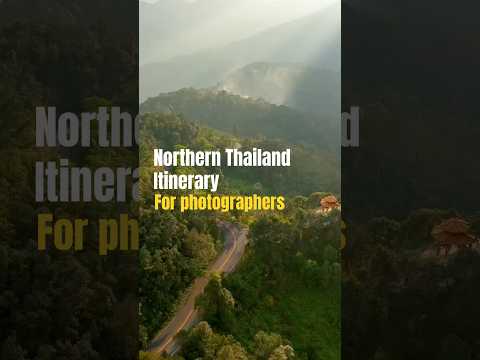
2 Week Northern Thailand Itinerary for Travel Photographers
InWanderment contains affiliate links. If you make a purchase or a booking using these links, we may receive a commission at no extra cost to you. This helps with the cost of running InWanderment. See our Privacy Policy page for more information. We appreciate your support!
Planning a Northern Thailand itinerary but overwhelmed with info?
If you’re a travel photographer chasing golden hour views and photo spots, this is the route you need.
When you’ve only got 2 weeks, you don’t want to waste time.
You want to know where to go, what’s worth it and how to make the most of the light.
Most people default to the Mae Hong Son Loop and while it’s popular for a reason, it’s not the best option if you’re into photography and want to make the most of your two weeks in Northern Thailand because it misses some epic spots.
There’s a better route, one that’s more scenic, a bit quieter and absolutely packed with stunning photo spots.
We spent three weeks travelling around northern Thailand, hiring a car and exploring all of these places ourselves.
This travel itinerary is based entirely on that trip and is perfect for photography lovers chasing sunrise views and hidden photo spots far from the usual tourist routes.
Expect gorgeous temples, misty mountain viewpoints, winding scenic drives and places that feel far from the usual tourist trail.
We’ll show you where to stay, what to photograph and how to make the most of every stop.

15-Day Northern Thailand Itinerary at a Glance
Planning a 2 week northern Thailand itinerary can feel like a lot to juggle, especially when you’re trying to balance scenic spots, photo opportunities and comfortable places to stay.
To make things easier, here’s a snapshot of the journey we took in a table, a map of the route a short video to give you a quick look! 👇
| 📅 Day | 📍 Location | 🛌 Where to Stay |
| Arrive in Chiang Mai | Chiang Mai | Bossotel Chiang Mai |
| Day 1-2 | Lampang | Happiness Resort Chae Hom |
| Day 3 | Chiang Rai | Baan Pordeedin |
| Day 4-7 | Phu Chi Fa | Ban Chomdoi Resort Pha Tang |
| Day 8-9 | Mae Salong | Maesalong Villa |
| Day 10-11 | Doi Inthanon National Park | Sailom Resort |
| Day 12-15 | Chiang Mai | Hotel De Khuvieng |
Itinerary Route Map
Northern Thailand Itinerary Video
💡 Planning a trip but not sure where to start? 🤔
👉 Grab your FREE Guide to 50+ of the BEST travel apps – Apps to help you navigate, find volunteer roles, house swapping, transport, planning, and more!
✈️ As full-time travel photographers, we’ve personally tested and used every app in this guide during our 18 months on the road, and they honestly made travel smoother, smarter, and way more fun.
📩Pop in your email and we’ll send it straight over – hope it helps make your next adventure a little easier!
Day 1: Arrive in Chiang Mai
(Optional: 1 night in Chiang Mai)
Your northern Thailand itinerary begins as soon as you arrive in Chiang Mai, most sleeper trains from Bangkok (the BEST way to get to the city), roll in around 7am, giving you a full day to get organised and hit the road.
Now, we love Chiang Mai and it’s absolutely worth your time but we’ll be circling back to spend a few days photographing it properly at the end of this loop.
So, rather than getting caught up in the city now, we recommend saving your energy and heading north straight away. The real magic begins once you’re out of town.
That said, you’ve got two options here, depending on how you feel:
👉 Feeling fresh? If you slept well on the train, we recommend picking up your hire car and driving straight to Lampang. It’s an easy 1.5–2 hour drive and a relaxed place to ease into the trip.
👉Need a rest? If you need a proper bed and a nap, Bossotel Chiang Mai is a solid, budget-friendly choice near the station for a quick overnight stay before hitting the road.
🚗 Car hire tip
We booked our car through Booking.com and would definitely recommend it.
It compares all the main providers in Chiang Mai so it’s quick and easy to find a good deal.
We hired for over 3 weeks and had zero issues, no scams, no hidden fees, no awkward surprises.
Most car rentals are based at Chiang Mai Airport, so it’s worth prebooking your hire car online, hopping in a Grab (Thailand’s version of Uber) from the train station to the airport. It’s about 15–20 minutes and then you’re ready to roll

Why We Don’t Recommend Bikes (Unless You’re Licensed)
We know you’ve probably heard all about those epic bike loops through northern Thailand. Zipping through the hills sounds amazing and yep, it’s probably on your bucket list.
But let’s just pause for a second. We’re not trying to spoil the fun, but if you don’t have a proper bike licence, there are a few things you really need to know before you decide
Motorbikes look like freedom, but unless you’re licensed and confident, they come with some serious risks.
The truth that many people don’t know is 👇
It’s actually illegal to ride a motorbike in Thailand without a valid motorbike licence from your home country (Or a Thai motorbike licence).
Rental shops often won’t ask for a licence and many won’t bat an eyelid if you clearly can’t ride. That might sound easy, but with steep, winding roads up north, it’s not the place to wing it.
And yes, it’s true that police often won’t check and yes, all they’ll usually ask for is your international driver’s permit. But having one of those doesn’t mean you’re legally allowed to ride a bike unless you have a motorbike licence in your home country or in Thailand.
If you don’t have a licence and something goes wron,g whether it’s an accident or someone takes legal action against you, you could be in serious trouble.
Your travel insurance won’t cover you and worse, you could find yourself on the wrong side of Thai law.
We’re not saying this to be boring.
We’ve got friends who didn’t know this until after they’d had a pretty bad accident and we’d much rather you go into your trip fully informed and make the choice that’s right for you.
That means if something goes wrong, you’re footing the medical bills yourself and we’ve seen a lot of bandaged travellers limping around Pai.
If you have a motorbike licence in your home country, brilliant. You’re good to go.
But if not, a car is by far the better option.
It’s safer, more comfortable (especially with luggage and camera gear) and gives you space to store everything you need for long travel days.
We hired a car for over 3 weeks and had zero issues, just a smooth, flexible way to travel and it’s not *that* much more expensive.
💡TIP: We use SafetyWing Nomad Insurance and have no hesitation in recommending them for your travels. We have had personal experience of filing a claim and dealing with them as an organisation. We found the claims process straightforward, and the payout was very quick!

Days 1–2: Lampang & Wat Chaloem Phra Kiat (The Floating Pagodas)
🚗 Drive time from Chiang Mai: 1 hour 23 mins
Lampang was our first real stop after leaving Chiang Mai, and it totally blew us away.
It’s home to Wat Chaloem Phra Kiat, also known as the Floating Pagodas, a group of white stupas perched high on rocky mountain peaks with jaw-dropping views in every direction.
It’s one of the most unique and peaceful temple spots we’ve ever photographed in Thailand and when we arrived at 7am, we had it almost entirely to ourselves.
No tour buses and no crowds, just five other friendly Thai tourists, mountain mist and the sound of bells in the distance.

Photography Tips for the Floating Pagodas
- Go early – Arrive by 7am to get soft light, fewer people and the best chance of moody morning mist drifting over the peaks.
- Drone flyers: Launch from the car park for a more reliable signal, we lost connection a few times further up the mountain.

Sony A7R3 Camera Settings – ISO-100, f/8, 1/200 sec, 46mm
Where to stay near the sky temple
We stayed at Happiness Resort Chae Hom, just ten minutes from the temple. It’s basic but has beautiful views and friendly owners.
Other nearby options that can be booked online (all 9+ rated):
- Tiny House Homestay and Cafe – 9-minute drive
- Pimpisa Garden – 15-minute drive
- Kaewma Farmstay – 15-minute drive
💡TIPS
- Make time for stops on the way from Chiang Mai to the hotel – There are loads of cute little cafés along the way, with Bali-esque, Instagram vibes but no crowds, or other people at all actually. Great for a coffee break or a relaxed lunch stop.
- Check your route carefully – Google Maps has a habit of suggesting back roads that look faster but can be super steep and rough, as we learnt the hard way. Making this mistake cost us an extra hour of drive time when we had to backtrack. Stick to the main roads, they’re far easier and safer to drive.

Day 3: Chiang Rai – Optional
🚗 Drive time from Lampang: 3.5 hours
Chiang Rai is often seen as the quieter little sibling to Chiang Mai and for us, it was the perfect place to catch our breath.
We stayed for two nights, not to cram in temples or activities, but to slow down, catch up on some work, and plan the next leg of our photography trip.
With amazing iced coffees, a peaceful hotel and some time to reset, it was exactly what we needed before heading deeper into the mountains.
That said, if your time is tight or you’re following a stricter northern Thailand travel itinerary, you can skip Chiang Rai and go straight on to Phu Chi Fah.
Just know that it makes a convenient overnight stop and offers a bit of comfort before heading remote.

Things to Photograph in Chiang Rai (If You’re Up for It)
We didn’t photograph much here, but if you’re keen to get the camera out, there are two standout temples which draw a lot of attention.
You’ve no doubt seen them on Instagram👇
- Wat Rong Khun (The White Temple) – surreal, striking and definitely different
- Wat Rong Suea Ten (The Blue Temple) – vibrant interiors and vivid colours
Where to stay in chiang rai
We stayed at Baan Pordeedin and absolutely loved it. It’s a peaceful guesthouse run by the Mirror Foundation, a grassroots NGO that supports ethnic minority communities in northern Thailand. The rooms are simple but comfy, with air con, free parking and a great breakfast.
By staying here, you’re also directly supporting local social projects, so it’s a stay you can feel good about.
They also have a great little charity shop upstairs where I got a checked shirt for a reasonable cost and donated a few things I didn’t use.

💡TIPS
- Take a little wander around Chiang Rai town, it’s local, lively and a great place to glimpse everyday Thai life.
- Try the steamed buns – trust us, they’re so good.
- And don’t miss the iced coffee stand in the garden next to Baan Pordeedin, hands down the best coffee we had in the city. A total hidden gem.
Days 4–7: Phu Chi Fa National Park & Doi Pha Tang
🚗 Drive time from Chiang Rai: 1.5 hours
Phu Chi Fa is one of the best photo spots in northern Thailand, especially during the dry season when you’ll catch the dramatic sea of clouds.
This national park is one of the best places for Thailand sunrise photography in our opinion, especially if you visit during the dry season.
Perched right on the border with Laos, this national forest park is all about mountain peaks, remote trails and epic sunrise views.
The name translates loosely to “mountain that points to the sky” and once you’re up there watching the mist roll through the valley below, it absolutely lives up to it.
This part of the trip is all about early mornings, mountain photography and that sea of clouds you’ve probably seen in photos.
If you’ve got time, it’s worth slowing down here for a few days, especially if you’re looking to capture atmospheric landscape shots.

Phu Chi Fa Photography tips
- Plan for sunrise in dry season (Nov–Feb) – this is when you’ll get that incredible cloud inversion effect across the valley. It usually lingers well into mid-morning.
- Doi Pha Tang is just 30 minutes away and offers sweeping views over the Laos border – make time to explore it too.

Where to stay in Phu Chi Fa
We stayed at Ban Chomdoi Resort Pha Tang and it quickly became one of our favourite places of the entire trip. Set above the valley, the views were unbelievable and we shot some of our best favourite photos without even leaving the room.
✅ Choice of basic rooms or camping
✅ Delicious home cooked Vegetarian meals on request
✅ Peaceful, family-run and very welcoming with a friendly cat and dog (bonus!)
Rooms don’t have air conditioning, but with cool mountain air and a ceiling fan, we didn’t need it. It’s a bit off the beaten path, but well worth the drive for a peaceful stay and top-tier views.

💡TIPS
- Fill up on fuel before you arrive – there aren’t many petrol stations in this area and you don’t want to be running low when you’re miles from anywhere.
- Bring snacks and essentials – you won’t find 7-Elevens or big convenience stores here. It’s proper off-the-beaten-path, so stock up in Chiang Rai or along the way.
📸 FREE Guide – 11 Simple Tips To Elevate Your Travel Photos
✅ Designed to help anyone take better travel photos, with no technical jargon, no confusing settings, and no need for fancy gear.
🎉 Simple, practical tips to take better photos – whether you’re using a camera or your phone!
Days 8–9: Doi Mae Salong
🚗 Drive time from Phu Chi Fa: approx. 2.5–3 hours
Tucked away near the border with Myanmar, Doi Mae Salong is one of the most unique places we visited in all of northern Thailand.
Doi Mae Salong might not appear on every northern Thailand itinerary, but it really should.
Also known as Santikhiri, it’s a small mountain village with a strong Yunnanese influence, shaped by Chinese settlers who made it their home decades ago.
What makes Mae Salong special is how different it feels from anywhere else.
Surrounded by tea plantations, pine trees and layered hills, the landscape feels more like somewhere in southern China than Thailand.
The atmosphere is peaceful, the pace is slow and it’s a brilliant place to unwind for a couple of days while still capturing some striking photographs.
Two nights is ideal here, but if you’re on a tighter schedule, you could see the highlights in a single day as everything is close together and easy to reach.

Photography Tips for Mae Salong
These two were out favourite photo spots in Mae salong 👇
- Wang Put Tan Tea Plantation – You can’t visit Mae Salong without visiting the tea plantations, rows of tea bushes sweeping across the hillside, with soft golden light in the early morning or late afternoon.
- Wat Phra That Santitham – a peaceful hilltop temple with panoramic views, an incredible sweeping staircase and colourful details.

Where to stay in Mae Salong
We stayed at Maesalong Villa and it was a perfect base for a couple of days in the hills. It’s a gorgeous guesthouse with incredible views. Make sure to request a room higher up… there are a few steps to get there but the view is out of this world.
The rooms are comfortable and well equipped, with everything you need for a few days of rest and photography a big bed, hot rainfall shower and even a fridge and kettle for tea breaks on the balcony. There’s no air con, but up here in the mountains, it’s cool enough at night with just a fan.
Breakfast is included and was just what we needed, toast, eggs, fruit and coffee and the on-site restaurant had a few tasty veggie options too.

💡TIPS
- Don’t miss the local market – a great chance to capture slices of everyday life and traditional Yunnanese culture. Just be sure to be mindful when photographing people.

Days 10–11: Doi Inthanon National Park
🚗 Drive time from Doi Mae Salong: approx. 6–6.5 hours
Doi Inthanon National Park. This is where northern Thailand goes full nature overload.
For those planning a photography road trip in Thailand, Doi Inthanon is a dream location, think pretty waterfalls, rugged forests, and cool mountain air
It’s one of the most famous National Parks in Thailand but with a fraction of the crowds you’ll find in the south.
If waterfalls and forest trails are your thing, this is a must on your itinerary for northern Thailand.
It’s also home to Thailand’s highest mountain, which brings cooler temperatures and a bit of a break from the heat.
If you’re into landscape and waterfall photography, this stop is a dream.

Photography tips for Doi Inthanon
- Mae Ya Waterfall (our favourite waterfall in the park) is best visited early, aim for 7–8am for soft light, cooler temps and barely any people. It’s one of the most powerful waterfalls we’ve seen in Thailand.
- Head to Pha Dok Siew trail around 2–3pm for lovely golden light over the rice terraces and village scenes. It’s one of the most authentic nature trails for both photos and experience and if you’re struggling to choose between Pha Dok and Kew Mae Pan, wonder no longer. Pha Dok Siew is the one.

Where to stay for doi inthanon National Park
We based ourselves in Chom Thong, just 30 minutes from the park entrance and it worked perfectly. Staying nearby meant we could head into the park early, beat the tour crowds and photograph the waterfalls with no one else around.
We stayed at Sailom Resort and honestly, it was a bit of a gem. Our room was clean and spacious with a hot shower, fridge, desk and loads of thoughtful extras, rom daily snacks and coffee to fresh lychees every single day.
For 600 baht a night (about £13), it was incredible value.
The owners were lovely and there were plenty of simple local restaurants just a short walk away, great for an easy dinner after a full day of exploring the park.
“My Vietnam” was our favourite restaurant for epic vegetarian meals!

💡TIPS
- If you’ve got extra time, we really recommend staying longer here. Two days gives you a great intro, but five days flew by for us and we still didn’t see everything. There are loads more waterfalls, nature trails and quiet spots tucked away in the park that you just can’t see in two days.
- There’s no public transport inside the park, so having your own car is essential to get there, get around and make the most of your visit.
- Entry to the park is 300 baht (around £7) per person and your ticket lasts five days, which is amazing value for everything you get access to.
📸FREE Photography Guide
Want to take your photography skills to the next level?
Download our FREE photography planning guide! It’s packed with 8 simple location tips to help you capture breathtaking photos, no matter your skill level.
Simply enter your details below, and we’ll send you the guide along with additional tips and tricks to inspire your photography journey. Whether you’re a beginner or looking to refine your craft, this guide will set you up for success.
Download our FREE guide below👇
Days 12–15: Chiang Mai City
🚗 Drive time from Doi Inthanon: 1.5–2 hours
Back in Chiang Mai for the final few days of the trip and it’s a great way to wrap things up. We recommend dropping off the hire car once you return, the city is compact, walkable and easy to explore on foot or by Grab and you won’t need a vehicle while you’re here.
Chiang Mai has over 300 temples, beautiful old city walls and a laid-back energy that makes it perfect for slow mornings and photo walks.
There are vibrant night markets, street food stalls on every corner and an easy atmosphere about the place that feels pretty chilled.
You’ll also find some brilliant day trips nearby if you want to explore further, including the famous Doi Suthep Temple, just outside the city and well worth a visit.
If you enjoy capturing food, faces and street scenes, Chiang Mai’s also great for cooking classes and food tours, which give you an insight into Thai cuisine and local life.
And for seeing elephants?
Our top choice is Chang Chill, an ethical elephant sanctuary in Chiang Mai, which is completely hands off and you can observe elephants in their natural environment.

‼️‼️Important Note: You will see elephant tours advertised A LOT in Thailand.
Please ensure you are booking with a truly ethical sanctuary where they are completely hands-off.
🐘This means No bathing – No touching – and No feeding.🐘
A truly ethical sanctuary is 100% hands-off and encourages natural elephant behaviours.
🐘 You can learn how to choose an ethical elephant sanctuary in Thailand here.
📍 In Chiang Mai? We recommend Chang Chill Sanctuary, an hour from Chiang Mai, which is the sanctuary that we chose to visit.
📍In Bangkok or Kanchanaburi? We recommend Somboon Legacy Foundation just a few hours from Bangkok, where we volunteered for a month.
🚌The only tour company we recommend for elephant tours is Seek Sophie as they are pioneers for responsible and ethical travel.
📚Please see The Call to Conserve website for a list of an up-to-date list of ethical elephant facilities in Asia.
Note: We will never recommend any tours involving animals unless we have been on these ourselves or have assurances from conservationists that they are ethical facilities.

Chiang Mai Photography tips
- For temple photography, we loved Wat Lok Molee and Wat Chedi Luang, they’re older, less polished and far more atmospheric than some of the newer, more ornate spots.
- If you’re visiting in November, you may be around for the Chiang Mai Lantern Festival. Whilst we don’t recommend taking part in the mass lantern release, we do highly recommend the colourful Loy Krathong Festival!

✨ Share your photos in my Travel Photography Facebook group! ✨
Where to stay in Chiang Mai
If it’s your first time in Chiang Mai, staying in the Old Town is the most popular choice. It keeps everything walkable, temples, cafés, markets and photo spots are all right on your doorstep.
The Old Town has loads of character and is especially lovely early in the morning before the crowds arrive.
But the thing is, you don’t *need* to stay right inside the Old Town. It’s a really easy walk into the centre from a ton of hotels that don’t cost a fortune and are usually quieter than the bustling centre.
We booked into Hotel De Khuvieng, a peaceful spot with a pool, gym and a brilliant view from the breakfast room.
It was around a 15-minute walk to the centre and being slightly outside the moat meant we passed local cafés, early morning vendors and quiet backstreets that gave us a more authentic view of daily life. It ended up being one of our favourite parts of the stay.
Plus, it was much more affordable than some of the places in the centre.

Got More Time? Here’s Where to Go Next
If you’ve got extra days to play with after this northern Thailand itinerary, there are a few more places worth checking out.
We haven’t been to these ourselves (yet!), but they’re popular stops for travellers heading that way and wanting to explore more of the North.
Mae Hong Son is still firmly on our list for when we return!
Mae Hong Son
Misty valleys, mountain roads and old wooden temples tucked into the hills. A quieter alternative to Pai with fewer crowds and more local charm. It’s a brilliant addition if you’re extending your itinerary for northern Thailand into more remote areas.
Mae Sai
Thailand’s northernmost town, apparently good for a glimpse of hill tribe culture and crossing into Myanmar (when open).
Chiang Saen
Set on the banks of the Mekong River, Chiang Saen is known for ancient ruins, peaceful scenery and a more laid-back pace. A nice stop if you’re looping toward the Golden Triangle.

Why we don’t recommend Pai
Not mentioning Pai in a Northern Thailand itinerary is like completely ignoring the elephant in the room.
So let’s jump into it.
Pai gets recommended by literally everyone. Blogs, guidebooks, and other travellers, it’s often described as a “must-see stop on any northern Thailand itinerary”.
Well, we’re here to say the complete opposite.
We booked five nights there, thinking we’d need the time to soak it all in.
But the truth? We left early.
After just a couple of days, we packed up and headed to Doi Inthanon instead and we’re so glad we did.
For us, Pai just didn’t offer what we love most about travel: culture, authenticity and atmosphere.
The town felt like it had been completely shaped around tourism.
The streets were packed with restaurants built for backpackers, the food was some of the least inspiring we’d had in Thailand and the overall vibe was more bar crawl than meaningful travel, which just isn’t our thing.
We looked up some of the local photography spots, Pai Canyon, the Bamboo Bridge, the Land Split and the hot springs and while they’re often mentioned online, all of the reviews and photos showed that they were all packed out at sunrise and sunset.
The kind of spots where it’s hard to find a quiet moment, let alone a unique angle.
To top it off, the journey to get there was genuinely rough. The road to Pai is infamous for its twists and turns with over 700 bends, in fact, and it’s not just a rumour.
Steffan was properly ill from the motion and even I felt travel sick, which never happens. For such an out-of-the-way drive, the payoff just didn’t feel worth it.
And sadly, we saw a lot of motorbike accidents. Pai is full of people renting scooters for the first time and the mix of traffic, sharp corners and inexperience isn’t a good one.
The night market was fun, quirky and lively but beyond that, Pai just wasn’t for us.
That said, we know a lot of people absolutely love it. If you’re looking for somewhere social, laid-back and backpacker-friendly, it might tick all the boxes.
But for a travel photographer searching for authentic travel and unique photos mixed with genuine local culture?
You’re better off spending that time elsewhere.

How to get from Bangkok to Chiang Mai
Before you can start your 2-week northern Thailand itinerary, you’ll need to get yourself to Chiang Mai, it’s the main city in the north and the perfect jumping-off point for a road trip.
This is where you’ll pick up a hire car, stock up on essentials and ease into the slower, more scenic pace of northern Thailand.
You’ll likely have flown into Bangkok and there are a few ways to get from Bangkok to Chiang Mai, but in our opinion, there’s really only one worth doing: the overnight sleeper train.
It’s a bit of a classic and for good reason.
The sleeper train is more affordable, more sustainable and honestly just a much nicer experience than flying. There’s something quite special about climbing into your bunk and falling asleep as the train chugs through the countryside, then waking up somewhere completely different.
I’ll be honest, I wasn’t convinced at first.
I’m the kind of person who needs a proper night’s sleep or I’m a nightmare the next day.
And the thought of sharing a carriage with strangers?
Not exactly my idea of relaxing.
But surprisingly, I really enjoyed it. The beds were comfy, it was quieter than I expected and there’s something calming about the gentle rocking of the train.
If sleeping on a train really isn’t your thing, there’s also a daytime train option. It’s slower than flying, but you’ll get views of rice paddies and rolling hills the whole way. Just bring snacks and a bit of patience because it’s a long one.
We always book our trains through 12Go Asia as they’re reliable, easy to use and their customer service is genuinely brilliant if anything crops up.

Getting around Northern Thailand
To fully follow this 2-week Northern Thailand itinerary, a car is your best option. It allows flexibility, access to sunrise photo spots, and space for camera gear.
While bikes are common in the region, we cover in detail above why we don’t recommend them unless you’re licensed. Trust us, it’s safer, easier, and still affordable.
Public transport can get you to a few of the main towns, but not to the scenic photography spots or remote national parks we’ve included.
To do this route without a car, you’d need to pay for taxis or private drivers multiple times and unless you’re hiring a private driver for the entire trip, it quickly becomes complicated and expensive.
The other option would be to get to Chiang Mai and then Chiang Rai and book day tours from there, which is possible, but costly and has its limitations in terms of photography.
We hired a car for the full trip and would 100% recommend it.
It gave us the flexibility to choose our own travel itinerary, time spent at each place and stop wherever looked interesting.
We could also easily reach places at sunrise without relying on anyone else’s schedule.
The roads are generally good and having your own wheels makes everything easier, especially with camera gear and luggage in tow.

Driving tips for northern Thailand
Driving in Thailand might sound daunting, but honestly?
It’s nowhere near as scary as people make out, especially if you’re confident behind the wheel.
Still, there are a few things to know that’ll make your road trip smoother (and safer):👇
1. Get an International Driving Permit (IDP)
Even if the police don’t always check, this is essential to be legal and insured. If you don’t have one and end up in an accident, your insurance won’t cover a thing, and no one wants that drama while they’re meant to be off chasing waterfalls.
2. Stick to main roads on Google Maps
Trust us on this. Google will sometimes try to take you on wild backroads that are steep, narrow and barely paved. Always check the route overview and stay on the highways wherever possible. It’s small details like this that can make or break a smooth northern Thailand itinerary.
3. Expect U-turns in the fast lane (!)
Highway U-turns in Thailand happen from the outside lane, which can catch you off guard. Drivers pull across traffic, stop in the fast lane and wait for a gap. Just go slow and keep your wits about you.
4. Watch for motorbikes everywhere
They’ll weave past you on both sides and gather at the front of traffic lights. Always double-check mirrors before turning or pulling out.
5. Don’t let anyone rush you
Locals might drive fast, but that doesn’t mean you have to. Let them overtake, take your time and enjoy the ride. You’ll settle into the flow quickly, and the views are worth slowing down for anyway.
🚗 Want the full lowdown on road rules, rental tips and safety advice?
Read our full post: Is It Safe to Drive in Thailand? Everything You Need to Know

When’s the best time to visit northern thailand for photography?
If you’re planning a trip to Northern Thailand with photography in mind, timing really matters. The seasons here can completely change the look (and feel) of your photos.
For travel photographers, the best time to visit northern Thailand for photography is November to February.
Here’s a quick breakdown of each season👇
🌤 November to February – Cool, Clear and Perfect
This is the golden window for photographers. Expect crisp mornings, soft light and some of the clearest skies of the year. As well as that famous sea of clouds in Phu Chi Fa. Visibility is amazing and the cooler temps make early starts way more pleasant. Just bring a jacket, it can be surprisingly chilly up in the mountains.
🔥 March to April – Smoke and Haze (Avoid if You Can)
This is burning season and honestly, we don’t recommend visiting for photography. The skies fill with smoke from crop burning, which massively reduces visibility and makes sunrise shots almost impossible.
🌧️ May to October – Rainy but Lush
The wet season means fewer crowds, rich green landscapes and dramatic skies but it’s not without its challenges. You’ll need to work around sudden downpours and some trails in Doi Inthanon National Park may be closed.

Travel photography gear for your trip
If you’re serious about making travel photography a bit part of your northern Thailand itinerary, packing the right gear goes a long way.
✅ Wide-Angle Lens
Ideal for those epic landscapes, temples and dramatic skies. Our wide-angle lens left the camera in places like Doi Inthanon.
✅ Mid-Range Zoom
Something like a 24–70mm gives you flexibility. Great for markets, tighter scenes or detail shots when you want a more natural perspective.
✅ ND Filters
A must-have for silky waterfall shots and harsh light. You’ll thank yourself later.
✅ Lightweight Tripod
Long exposures or low-light shooting? You’ll need one, just make sure it’s light enough for all-day use.
✅ Dry Bag + Rain Cover + Lens cloth
Waterfalls and misty mornings mean damp gear. A rain cover, dry bag and a few lens cloths are essential.
✅ Spare Batteries and SD Cards
You’ll be shooting a lot, especially at sunrise and sunset when light changes quickly. Don’t get caught short.
✅ Drone (Optional, but incredible!)
Some of the best drone photography locations in Thailand include Doi Pha Tang and Phu Chi Fa and drones are Incredible for remote views, but make sure it’s properly registered. Thailand does not mess around with drone rules, we use Drone Traveller for up-to-date info.

What to Pack: Clothing for Northern Thailand Shoots
A good packing list can make your northern Thailand travel itinerary run much more smoothly, especially with early starts and changing weather.
✅ Layer Up for Sunrise
Mornings in the mountains can be really chilly, a fleece or extra base layer is a must.
✅Decent Walking Shoes
Think breathable, supportive and grippy, perfect for trails and temple stairs alike
✅Light, Quick-Dry Clothing
Ideal for hiking and handy for temple visits. Loose trousers or long skirts keep things respectful and cool.
✅Sun Hat + Sunscreen
The mountain sun can be intense, don’t skip the SPF even when it’s breezy.
✅Comfy Camera Bag
A padded, practical backpack with water bottle storage and easy side access will make your day ten times smoother.
Water Bottle Tip: We recommend Water-to-Go filter bottles, as they can be used to filter almost anywhere and filter out both viruses and bacteria. Keeping you hydrated and safe and reducing single-use plastics! A simple thing you can do to protect the planet and save money while you’re at it!

How Much Does Two Weeks in Northern Thailand Cost?
Here’s a rough idea of what you can expect to spend over two weeks, based on our trip, just bear in mind it will vary depending on where you stay, what you book and how often you stop for iced coffee (guilty!).
These costs are based on our trip and what we paid so for two people travelling and staying at the accommodations we have recommended in this guide.
Of course, costs change, but this should give you a rough idea of what you’re likely to be spending.
Also, we never budget hard, so you can definitely do this for less!
| Category | Cost GBP | Cost USD | Cost Thai Baht |
| Car hire with full insurance (per day) | 22 | 28 | 1000 |
| Petrol (total) | 70 | 90 | 3200 |
| Accommodation (average per night) | 23 | 29 | 1050 |
| Food (per day for two) | 10-15 | 13-19 | 450-650 |
| Entrance fees (total for two) | 30 | 38 | 1350 |
| Sim Data (1 month for two) | 16 | 20 | 700 |

Is it safe to travel in northern thailand as a photographer?
Absolutely. We felt safe every single day, whether wandering through busy Chiang Mai or quiet mountain villages like Mae Salong.
Even with our cameras out, we never felt uncomfortable, people were warm, friendly and always said hello.
We didn’t run into any scams and even roadside police checks were polite and professional.
Road safety in Northern Thailand
We drove for three weeks around Northern Thailand and honestly?
It was smooth and stress-free. Roads are generally in good condition, though you’ll hit winding mountain routes now and then.
Thai drivers were surprisingly patient and if you’re confident behind the wheel and take it slow on the steeper sections, it’s a brilliant way to reach the more remote photography spots.
Improve Your Photos!
✨ FREE 11 Simple Tips To Elevate Your Travel Photos ✨
Simple, practical tips to take better travel photos – whether you’re using a camera or your phone!
👉 No confusing camera speak, no settings to mess around with, just easy tips you can use straight away 👈

✨ Share your photos in my Travel Photography Facebook group! ✨
What’s the best tourist sim for Northern thailand?
If you’re heading off the beaten path, having good data coverage is essential not just for directions and sunrise times, but also for scouting photo spots and backing up images.
Strong signal is especially important if your northern Thailand itinerary includes off-grid locations and sunrise missions.
We used AIS throughout our Northern Thailand trip and it was excellent. Signal held up even in remote places like Phu Chi Fa, where other providers can drop out.
You’ll find AIS stores in Bangkok and Chiang Mai, or if you want to be ready before you land, you can get an eSIM instead.
We’ve used one before and it was super quick to set up.
Yes, eSIMs are a little more expensive but they’re totally worth it for a hassle-free start.

FAQ – 2-Week Northern Thailand Travel Itinerary
How many days do you need in north thailand?
We’d say 10–14 days is ideal to explore the best spots without rushing. Two weeks gives you enough time to loop through the highlights like Doi Inthanon, Phu Chi Fa, Mae Salong, Chiang Rai and Chiang Mai, while also allowing time to slow down and enjoy the landscapes and photography opportunities. We’re big fans of slow travel and whilst you can do this route faster, you will get tired quicker.
is northern thailand worth it?
Absolutely, especially if you’re into photography, nature and culture. Northern Thailand is less touristy than the islands and beaches in the south and offers a much more authentic and peaceful experience.
Is petrol expensive in thailand?
Not at all, we actually found it to be really affordable. We only spent around £70 on fuel for the entire trip, which is amazing value! Just a quick tip: make sure you fill up before heading into more remote areas like Phu Chi Fa and Mae Salong, as petrol stations become few and far between.
is 2 weeks in Thailand long enough?
It depends how much you want to see. For a taster of a few areas, two weeks is a great amount of time, to explore either Northern Thailand in depth, or to combine a week in the north with a week somewhere else. If you’re into photography and want to experience culture, cooler climates and mountain landscapes, a full two weeks up north is perfect.
Can i visit northern thailand in the rainy season?
You can, but you’ll need to be flexible. Expect downpours, possible trail closures and slippery paths but also dramatic skies, lush green landscapes and fewer crowds. It’s a great time for waterfall photography if you don’t mind getting a little wet!
Is it easy to fly drones in northern thailand?
Yes, in many places but make sure you’re flying legally. You need to register your drone with the CAAT and get permission from the NBTC before flying in Thailand. We flew ours in remote areas like Phu Chi Fa and Doi Pha Tang without issue, but always check rules in advance. We recommend Drone Traveller for up-to-date advice.
Is Northern Thailand less touristy?
Overall, yes, Northern Thailand is much less touristy than the south. While places like Pai can feel crowded and very much on the backpacker trail, the region as a whole is far more untouched and authentic. In spots like Mae Salong and Phu Chi Fa, you might not see another tourist at all. It’s perfect if you’re looking to escape the crowds and experience a more local, laid-back side of Thailand.

Where to go next after northern thailand?
So, you’ve explored Northern Thailand and fallen in love with the culture, scenery and food… but you’re itching to discover more of this incredible country?
While most travellers make a beeline for the southern beaches, we absolutely adored Kanchanaburi, just a few hours from Bangkok.
It’s home to some of the most stunning waterfalls we’ve ever seen, buzzing night markets, peaceful temples, a genuinely ethical hands-off elephant sanctuary, and heaps of powerful wartime history.
Plus, you can take a really cool train journey to get there all the way from Bangkok.
If you’re spending time in Bangkok, make sure to visit the Dragon Temple (Wat Samphran), a jaw-droppingly unique Buddhist temple with a dragon wrapped around a pink tower.
It’s one of the most epic drone photography spots we’ve found in Thailand and easily one of the most unusual temples we’ve ever visited.
Thailand is a vast and wonderfully diverse country, packed with unbelievable photography locations. You’re unlikely to see it all in one go but like us, you’ll probably find yourself planning your next trip while editing your photos back at home!

Love capturing photos while you travel? ✈️📸
Check out my Travel Photography series for easy tips and tricks to help you take stunning shots on the go! I cover everything you need to know to improve your photography while exploring the world.
More Thailand Inspiration!
- Visiting Phu Chi Fa Mountains in Thailand – A Photographers Guide
- 2-Week Northern Thailand Itinerary for Photographers
- How to get from Chiang Mai to Doi Inthanon National Park
- Guide to Ang Ka Nature Trail in Doi Inthanon National Park
- Pha Dok Siew Nature Trail – Doi Inthanon National Park
- How to choose an ethical elephant sanctuary in Thailand
- Kew Mae Pan Nature Trail in Doi Inthanon National Park
- Mae Ya Waterfall in Doi Inthanon National Park – A Photographers Guide
- Mae Klang Waterfall in Doi Inthanon National Park – A Complete Guide
- Mae Salong in North Thailand – A 2-Day Itinerary
- Things to do in Doi Inthanon – A Day trip from Chiang Mai
- The Overnight Sleeper Train from Bangkok to Chiang Mai
- How to Visit Thailand’s Sky Temple in Lampang
- How to Travel from Chiang Mai to Bangkok by Day Train
- Ultimate Guide to Wat Sam Phran Dragon Temple in Bangkok
- Visitors Guide To Sirithan Waterfall in Doi Inthanon
- Wachirathan Waterfall in Doi Inthanon – A Complete Guide
- 4 Beautiful Doi Inthanon waterfalls You Shouldn’t Miss
- A Complete Guide to 3 Beautiful Doi Inthanon Hikes
- A Complete Guide to Twin Royal Pagodas at Doi Inthanon
- Chang Chill – An Ethical Elephant Sanctuary in Chiang Mai
- Is It Safe to Drive in Thailand? Everything You Need to Know
- Chiang Mai Lantern Festival: Is it Worth it? An Honest Guide
- 11 Best Places to Visit in Northern Thailand for Photography
- 4 Day Chiang Mai Itinerary for Photographers
- Guide to The Tiger Cave Temple in Kanchanaburi – Wat Tham Sua
- The Photographer’s Guide to Erawan Waterfalls, Kanchanaburi
Tips to elevate your photography
- Mastering What Shutter Speed to Use for Perfect Shots
- Must Have Travel Photography Gear for Your Next Adventure
- How To Find Photography Spots: A Travel Photographers Guide
- When is the Best Time to Take Pictures Outside?
- Best Lens for Travel Photography: What to Pack and Why
- 17 Photography Composition Techniques for Top Travel Photos
- Understanding Aperture: Examples & Photos for Beginners
- Practical Tips to Elevate Your Photography on a Cloudy Day
- 21 Tips for Photographing Mountains
- Ultimate Guide to Perfecting Waterfall Photography
- What is Travel Photography? Start your adventure today!
- 11 Types of Travel Photography Every Traveller Should Explore
- 16 Game-Changing Tips on Travel Photography
- Beginners Guide To Photographing People While Travelling