
21 Tips for Photographing Mountains
InWanderment contains affiliate links. If you make a purchase or a booking using these links, we may receive a commission at no extra cost to you. This helps with the cost of running InWanderment. See our Privacy Policy page for more information. We appreciate your support!
Photographing mountains for beginners can be a daunting challenge. Knowing what camera settings to use to really emphasize their scale and grandeur can make or break your shots.
And as a travel photographer you want to be able to capture not only what you can see but the atmosphere and feelings of awe.
Our passion for landscape photography has taken us to national parks photographing mountains around the globe. Shooting in varying landscapes with challenging weather conditions and heading up dark paths at night with only our head torch and a vague idea of how to get up there.
We’ve put together these mountain photography tips to give you all the info you need to get some jaw dropping photos!
In this blog we will be covering how to photograph mountains, including:
- The best camera settings for mountain photography
- How to find the best mountain photography locations
- Essential camera gear for mountain photography
- Mountain photography tips

1. Keep your ISO low
The ISO you choose for your image will affect the level of detail in the image and how much you will be able to zoom into the photo without it going grainy. The higher the ISO the more grainy the image will be.
Generally, when photographing mountains, you want your ISO to be as low as possible. If you are using a tripod to balance your camera you can easily use ISO 100 without any issues.
But don’t let this stop you from using higher ISO values if you need to capture a moving object or you are using your camera handheld. Just try to keep it under ISO 1600.
📸 FREE Guide – 11 Simple Tips To Elevate Your Travel Photos
✅ Designed to help anyone take better travel photos, with no technical jargon, no confusing settings, and no need for fancy gear.
🎉 Simple, practical tips to take better photos – whether you’re using a camera or your phone!
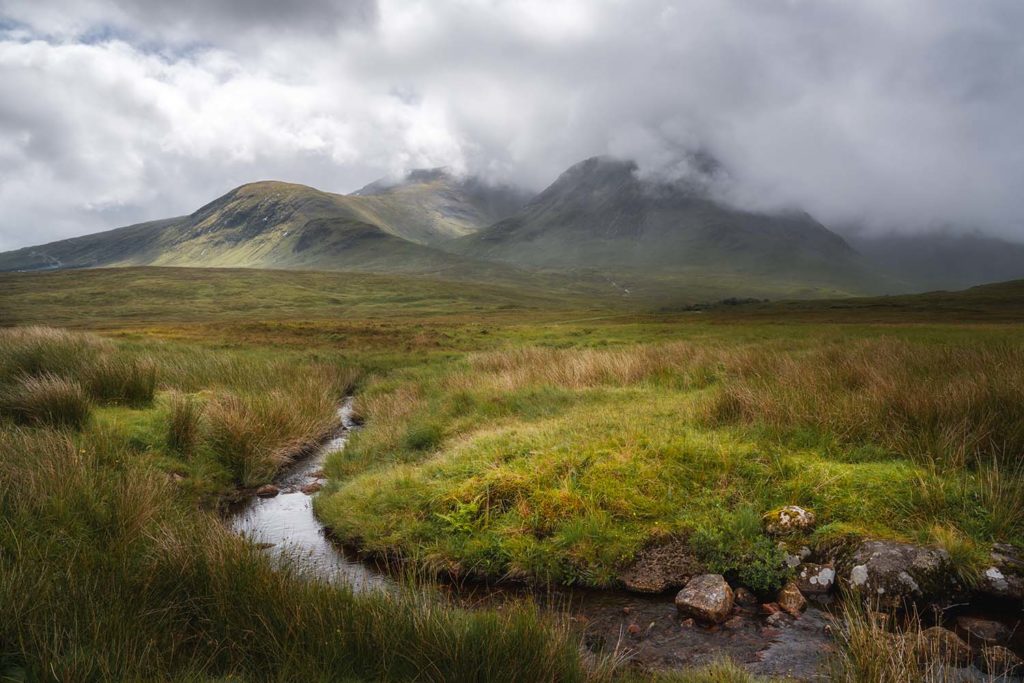
2. Use a high Aperture Value
A mountain range has a lot of depth, where your foreground and background can be many miles apart. To ensure everything within your image is sharp you will need to use a small aperture. Most lenses have an aperture or f-stop number where the lens is at its sharpest.
Just google the make and model of your camera lens to find out this info. This can be a good starting point, and from there move up the range until you have a sharp image without any obvious image distortion. But if you asked us what we use, generally between f8 and f14.
💡What is aperture? Not sure what aperture is? Don’t worry! Check out our easy guide with simple explanations and plenty of photo examples to help you understand!

3. Forget speed when it comes to your shutter
“The wind blows but the mountain remains still”
Japanese proverb
A long shutter speed can work really well if you want to get the best pictures of mountains. You will be able to capture all of the movement in the clouds, water, and trees while the mountain stays strong and grounded in the image.
Try using exposure times from 1 second all the way to 30 seconds to try and emphasise the passing of time and how the mountain remains unaffected.
💡What is shutter speed? Are you confused about the term shutter speed? Don’t panic! We have a simple, easy-to-read guide breaking down everything you need to know to elevate your photos using shutter speed!

4. Put your camera on a tripod
To achieve the long shutter speeds you will need a tripod. We recommend getting something sturdy, which will be in the higher price range, but when you’re set up on the side of the mountain in strong winds and your camera is unaffected, you will see why it’s important.
A week before our landscape photography trip around Scotland and The Isle of Skye our cheap Amazon tripod met its end on the side of a mountain in the Brecon Beacons.
We bit the bullet and bought a very nice sturdy carbon fibre tripod. Even in the high Scottish winds, the camera didn’t move an inch and we got some fantastic long exposures!
Another consideration is weight, as you will often be hiking to a location it’s good to ensure you keep your gear weight down. For this reason, consider the carbon fibre variants.
5. Full-frame cameras are great but heavy!
Nature photography requires capturing scenes with a lot of dynamic range. Whether it’s a Sony, Nikon or Cannon, the larger sensor of a full-frame camera can be really helpful. But it’s a double-edged sword, the larger the camera the heavier it will be.
We own a full-frame Sony A7 series camera which is on the heavy side but also captures most scenes without the need for bracketing.
Packing the right camera gear can make or break a photography trip.
📸FREE Photography Guide
Want to take your photography skills to the next level?
Download our FREE photography planning guide! It’s packed with 8 simple location tips to help you capture breathtaking photos, no matter your skill level.
Simply enter your details below, and we’ll send you the guide along with additional tips and tricks to inspire your photography journey. Whether you’re a beginner or looking to refine your craft, this guide will set you up for success.
Download our FREE guide below👇
6. Take a range of lenses
While there is no best lens for mountain photography, wide angle lenses certainly make a good case for it. A wide-angle lens is perfect for capturing huge sprawling landscapes with mountainous backgrounds. Many landscape photographers use a 16mm focal length to capture a foreground subject and the mountain peaks behind it. If you’re wondering why do mountains look smaller in pictures it’s because the photo was taken with a wide angle lens.
A telephoto lens with a longer focal length makes objects in the foreground seem smaller and objects in the background bigger. If you’re wondering how to make mountains look bigger in photos then this is all you need. At a focal length of around 100mm your background subjects will start to look huge!
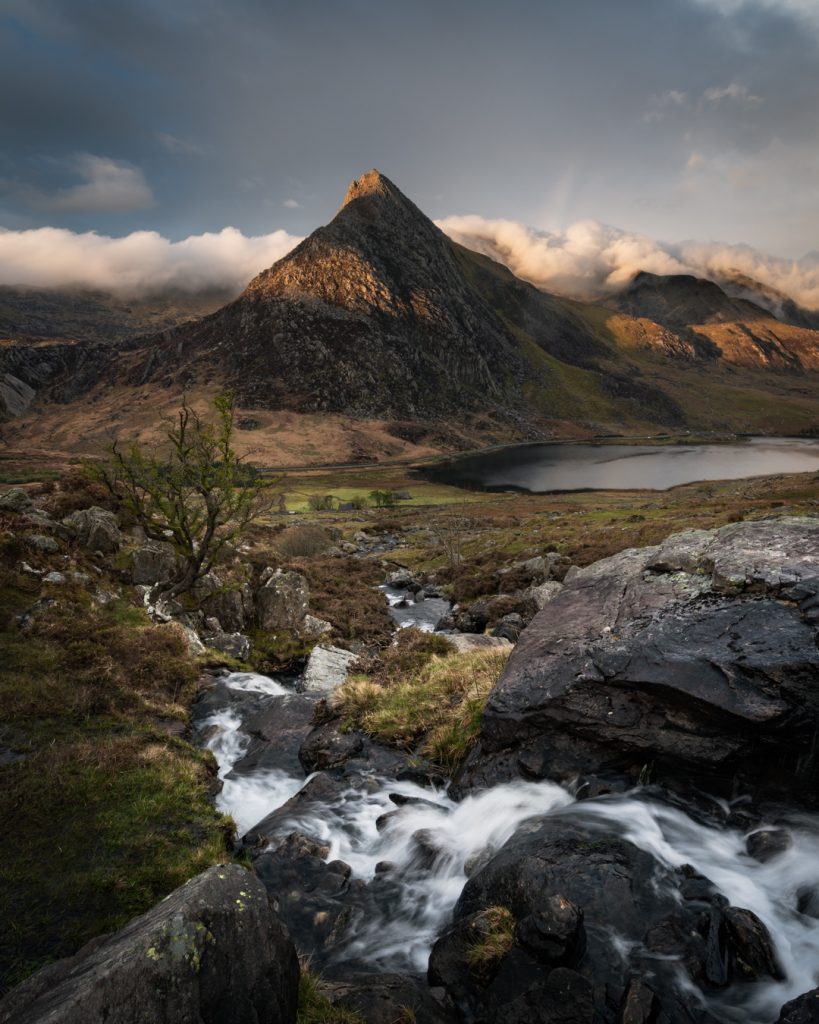
7. Use the zoom lens on your phone
If you’re wondering how to make mountians look bigger in photos with an iphone then you will need to use the zoom camera function. The standard camera uses a wide angle lens which is what makes the mountains look small.
Using the zoom camera will make the mountains look bigger, unfortunately the quality of the image isn’t great. Phone camera technology is developing very quickly so the quality of zoom cameras will improve in time.
Another way to make the mountains look bigger in photos with an iphone is to use an external add on zoom on the main camera.
When used correctly this will give a zoomed in photo which increases the size of the mountains in the photo all while using the good quality of the main camera.
❓Confused About Which Camera Or Gear To Buy?
👉Let Us Do the Hard Work and find your perfect match!💞
Stop wasting hours lost in endless camera reviews, let us do the hard work and find the perfect match for you with our Custom Camera Match Service
8. Don’t forget your polariser and ND filter
You will want to take a polarising lens filter, in case you find a nice lake to reflect the mountain. It will help cut out some of the glare from the water and allow you to see what is beneath the surface in shallow water.
ND filters are like sunglasses for your camera sensor and will reduce the amount of light going in. This will give you the shutter speed you need to create awesome effects like swirling clouds around a mountain or glass-like water to create stunning reflections.

9. Research the Location
The best research you can do is to physically scout a location before taking your camera.
You can check out a spot for composition and light direction later in the morning and not have the pressure of getting everything done in the golden hour, which can often lead to rushed decisions and suboptimal compositions.
Many times we have not prepared well enough in advance and missed the best moments to take a beautiful photograph!
Physical scouting is not always possible, so your best bet is to use some of the geo-apps to find and research photography spots.
When we are out and about we use The Photographer’s Ephemeris or TPE3D for short. This app gives you a 3D map of the landscape and also a visual representation of how the light will fall on the land at the time and date you specify. This app which is tailored for photographers is available on iPhone or Android.
But best of all is Google Earth Pro which can be downloaded for free. It has the same features allowing you to check the landscape in 3D and how the light will fall. It also has 3D maps of some cities including all of the buildings.
We have put together some hint cards for when you’re out in the field.
You can enter your details below to get these sent through to your email account – we promise not to spam you!

10. Make sure you are in position for golden hour
Using the aforementioned apps or by scouting the area you should have a good idea of where you need to be to take your perfect sunrise or sunset photo.
You should aim to be in place for your shot before golden hour occurs with your camera set up on your tripod. This will give you the best chance of getting the perfect shot and not missing any of the best light which can be very frustrating.

11. Make use of foreground elements
Mountains make perfect backdrops but let us not forget that to make a balanced, interesting photo you will likely need to include a foreground subject.
While photographing the Snowdonia mountains we really started to hone in on finding interesting foregrounds like stone pathways, rocks in lakes, beautiful waterfalls and even sheep!
Have a look around for plants, rock formations or anything that adds to the scene and tells the story of the place.
💡Bonus Tip – plants can be very difficult foreground subjects in windy conditions. Sometimes it’s better to find a nice sturdy foreground rock.

12. Focus stack your image to get everything sharp
Because of the vast distances between the subjects when photographing mountains, photographers use focus stacking to ensure everything in the image is sharp.
Focus stacking is done by taking multiple photos focusing on different areas in the scene. You will be focusing on one image in the foreground, the other on the midground and one on the background.
In the editing process, you can blend these images together either automatically using a feature in Photoshop or by blending masks together.

13. Bad weather makes a good photo
It is true, particularly for mountain photography that stormy weather only adds to the majesty of the mountains showing how they can weather any storm. Cloudy weather photography can be some of the best in your portfolio don’t be put off even in cloudy and stormy conditions.

14. Make sure your horizon line is on point
There is no golden rule for where your horizon line should be. But generally, a horizon line slap bang in the centre of your image can make it look unappealing. Generally, we put the horizon line in the upper 3rd of the image to show the landscape and capture enough of the sky to set the mood.

15. Use an element to show the scale
One of the most important factors when producing great landscape photography is scale. There should be lots of things around the base of the mountain that you can use to compare its huge size to. These can be things that are normally big when you’re up close but in your image are dwarfed by the immense mountains behind them. Some ideas can be trees, houses or a bridge.
Another thing you can use is a person in the foreground so don’t be afraid to bring someone along and try out some different mountain photography poses.
💡Bonus Tip – Use a telephoto lens and stand as far back as possible to make your foreground subject smaller and the background subject bigger.

16. Send up the drone
Whilst mountain environments can be quite demanding on your drone the results can be outstanding. Your drone supplier will give a max wind speed that you can fly in which is often less than what the mountains will throw at you.
We have even brought down our drone on snowy days to find icicles formed on the propellers. If you’re an experienced pilot and you’re ok with the risks involved, then you can achieve some new jaw-dropping perspectives with drone photography.
Be sure to check the National Park you are flying in allows drone flights.

✨ Share your photos in my Travel Photography Facebook group! ✨
17. Be safe and make sure you’re prepared
When you’re photographing mountains you will be putting yourself in an environment that can be dangerous, even deadly if you’re not careful.
Be sure that you have packed the right clothing, including waterproofs, and you have checked weather warnings and seasons if you are travelling abroad for photography.
Be sure to have enough food to keep you going, including emergency high-energy rations like marzipan/chocolate bars.
Our favourite new piece of safety equipment is our GPS Satellite phone. It comes with a built-in SOS button that will have a rescue team sent to your location when pressed and as long as you have a line of sight to the sky you will have reception.

18. Wait for the photo to come to you
Patience is a virtue and it’s especially true in photography. Photographing mountains can be challenging work with the constantly changing weather conditions. For this reason, once you have found a composition you are happy with, stay around and see what happens.
Mountains can look their best when the clouds subside to reveal the peaks of the mountains or when the sunlight bursts through them shining a beam of light onto the landscape.
There’s nothing worse than seeing the clouds part and the scene come alive with light just as you’re getting into the car.
Want to improve your travel photography but not sure where to start?
📸 Join Travel Photography Fast-Track – Personalised 1-on-1 coaching to take your travel photography to the next level!
Not ready for coaching?
✨ Try Photo Feedback+ – Get expert feedback and a step-by-step plan to transform your photos.


19. Try some minimalist shots
When photographing mountains you don’t always have to include everything. You can often get compelling images by focusing on the details. Try using a telephoto lens to get in close to features of the mountain that others may have missed or capture a mountain peak as the moon rises behind it.

20. Check the mountain weather forecast
The mountains have their own weather system so even if it’s clear when you leave your home it can be completely overcast on location.
Most countries will have some form of specific weather forecasting for mountainous areas.
You should always check the weather conditions in the mountains not only for good photography but to keep yourself safe. Being caught in a whiteout snowstorm on a mountain can be a terrifying experience so best to avoid that kind of situation altogether.

21. Camp out on the mountain for epic sunrise shots
Provided you are experienced at camping, you have checked the forecast and have your satellite phone with you, camping on the mountain can be an awesome experience.
This way you can wake up pretty much on location and start shooting away while the coffee brews on the gas stove. This can also be safer than hiking somewhere in the dark and is certainly more pleasant than waking up at 3am.

Frequently asked questions when photographing mountains
What settings do you need to photograph mountains?
For mountains, you will normally be using a high fstop number like f10-f14. Your ISO should be as low as possible, between 100-1000.
And your shutter speed should be as long as possible without any objects blurring as they move in the wind.
How do you take pictures on a mountain?
Avoid climbing to the top of a mountain to take pictures.
The best photos of mountains are from either the base of the mountains or about a third of the way up.
How do you photograph mountain landscapes?
To get the most out of your mountain pictures include other elements of the surrounding landscape.
A waterfall cascading down the side of a mountain makes an excellent foreground adding to the natural beauty of the scene.
How do you make mountains look closer in pictures?
It’s all about the zoom.
When you’re zoomed in on your camera things that are further away from your camera look bigger and things that are close look smaller.
This is how you achieve the effect where a house looks tiny in front of a huge mountain.
What lens to use for mountains?
Wide-angle lenses are great for showing foreground subjects with layers of mountains in the background.
Their focal length usually ranges from between 16-24mm.
But telephoto lenses can also be great as they can compress the image and make the mountains look enormous in the background.
What are your best tips for photographing mountains?
Our best tips are to use scale and a long exposure.
The long exposure will give the sense of time passing over a still mountain by showing movement in clouds, trees or water.
And emphasising scale by putting a small house, tree or person in front will really show the majesty of the huge mountain in the background.

Conclusion
Capturing compelling images of mountain landscapes requires technical skills and a good understanding of the right gear for the job.
Using a tripod, polariser and ND filters will really set your images apart from photos people have snapped on their hikes.
Understanding weather conditions and the landscape will not only keep you safe, but it will also give you the best chance of being in the right place at the right time to capture an inspiring image.
Safety is paramount, and someone needs to be there to edit the photos at the end of the day. So as the scouts say “be prepared” and be safe when venturing out into the mountains.
Your photos will improve with your level of patience as you reap the benefits of waiting for the clouds to clear and reveal the hidden mountain peaks hidden within.
Remember to add foreground elements to show that the mountains are a diverse landscape filled with natural beauty.
Mountains are the largest and most magnificent structures on earth and it is our job as photographers to do them justice.
We hope these mountain photography tips will help take your mountain pictures to new heights.
Would you like to connect with other photographers who share your passion?
✨ Exclusive content on finding beautiful photography locations – how to get there, the best times to visit, and what shots to capture!
✨ Tips, advice and tailored support on photography gear and techniques!
✨ Inside information on the best photo spots in specific locations to help you plan your next trip!
✨ Connecting with other Travel Photography lovers!
Tips to elevate your photography
- Mastering What Shutter Speed to Use for Perfect Shots
- Must Have Travel Photography Gear for Your Next Adventure
- How To Find Photography Spots: A Travel Photographers Guide
- When is the Best Time to Take Pictures Outside?
- Best Lens for Travel Photography: What to Pack and Why
- 17 Photography Composition Techniques for Top Travel Photos
- Understanding Aperture: Examples & Photos for Beginners
- Practical Tips to Elevate Your Photography on a Cloudy Day
- 21 Tips for Photographing Mountains
- Ultimate Guide to Perfecting Waterfall Photography
- What is Travel Photography? Start your adventure today!
- 11 Types of Travel Photography Every Traveller Should Explore
- 16 Game-Changing Tips on Travel Photography
- Beginners Guide To Photographing People While Travelling
Beautiful Photography Destinations
- Isle of Skye Photography Guide – 15 Stunning Locations
- 13 Beautiful Places for Landscape Photography in Scotland
- 10 Beautiful Places in North Wales UK for Photography
- Snowdonia Photography – 11 Breathtaking Locations
- How to Spend a Weekend in Cornwall – A 2-Day Itinerary
- Five of The Best Dorset Photography Locations
- Wachirathan Waterfall in Doi Inthanon – A Complete Guide
- How to Visit Thailand’s Sky Temple in Lampang
- Visiting Phu Chi Fa Mountains in Thailand – A Photographers Guide
- Mae Salong in North Thailand – A 2-Day Itinerary
- Mae Ya Waterfall in Doi Inthanon National Park – A Photographers Guide
- Mae Klang Waterfall in Doi Inthanon National Park – A Complete Guide
