
Must-Have Travel Photography Gear For Your Next Adventure
InWanderment contains affiliate links. If you make a purchase or a booking using these links, we may receive a commission at no extra cost to you. This helps with the cost of running InWanderment. See our Privacy Policy page for more information. We appreciate your support!
Packing for a photography trip can feel like trying to solve a puzzle with too many pieces. You want to travel light, but still take the best travel photography gear that helps you capture incredible shots.
And with so many recommendations floating around online, it’s hard to know what’s genuinely worth the weight and what’ll just sit at the bottom of your bag.
We’ve been there.
When we started travelling for photography five years ago, we made all the classic mistakes. We packed gear we never touched. Bought cheap versions of things that broke too quickly. And wasted money on things that looked useful but weren’t.
Take our first tripod. It was a flimsy plastic thing from Amazon, affordable, yes, but halfway through a sunrise shoot in South Wales, it snapped. On the side of a mountain. In minus temperatures. We chucked it in the car park bin and vowed to never skimp on gear research again.
Since then, we’ve tested every kind of travel photography setup, from ultra-minimal to slightly excessive. And now we’ve landed on what works. This guide breaks down the essential travel photography equipment, no fluff, no overpriced nonsense and no backpack full of regrets.
So let’s get into our travel photography gear list that’s full of kit we actually use every time we go out to shoot!
📸If you are reading from the UK, you’re in luck as all the links below are for WEX, who deliver within the UK and offer super competitive prices!
If you’re a faraway friend, then check out B&H, who deliver internationally and stock an incredible range.
What camera to take
For obvious reasons, there’s one piece of travel photography gear you really can’t get by without, and that’s your camera.
When we’re out shooting, we carry three cameras.
👉Our main full-frame camera has a large sensor, which means it performs brilliantly in low light and gives us super high-quality images.
👉Then we have a compact backup camera that’s lightweight but still delivers impressive results.
👉And finally, an action camera for those moments when we need something waterproof and rugged.
📸 Our Main Camera: Sony A7 Series
Let’s start with the big guns, and that’s the full-frame camera.
Now you need to know that it’s likely to be the most expensive thing you will purchase for your travel photography kit.
But if you pick up a newer model it will last you for many years. We’re still using our Sony A7Riii from 5 years ago and have no plans to upgrade it any time soon.

Some experts will tell you that you don’t need a high megapixel count, and they’re right, you don’t NEED it. But having a high megapixel count gives you a lot of flexibility, particularly when starting out, to crop and zoom in on your photo in the editing process without ending up with a poor quality photo. This essentially allows you to fix your compositions in post production.
Our sony camera has been everywhere with us. It’s survived icy winds, waterfall spray and being knocked about in backpacks in the jungles of Borneo. It’s still going strong.
So when we sony cameras are durable, we mean it.
If you’re after a camera that delivers stunning images and won’t let you down in the wild, we recommend the Sony A7R IVA Digital Camera Body. It has a 61mp sensor (plenty of room for cropping) and is a more affordable choice than the newer Sony A7RV.
The only reason we don’t recommend the Sony A7Riii is that they’re difficult to come by due to newer models being released.

📷 Our Backup Camera: Sony RX100 IV
While we were travelling, Emma started getting pretty frustrated with the quality of her iPhone photos. She wanted to take awesome shots too, but without faffing around with complicated settings.
So we picked up the Sony RX100VII while we were in Malaysia, and it’s been one of our favourite bits of travel photography gear for beginners ever since.

It’s compact, beginner-friendly and surprisingly powerful.
The 20MP 1-inch sensor gives it solid dynamic range for such a small camera. Sure, it’s not going to compete with a full-frame in low light or at sunset, but in good daytime conditions, it’s phenomenal.
One of the best things about it? The zoom. You get up to 200mm at f/4.5, which is seriously good for a camera that fits in your pocket. And at the wider end, it opens up to f/2.8, which helps a lot in low light.
If you want something small, capable, and easy to use, this is a brilliant travel companion.

🎥 Action Camera: GoPro Hero 8 (or Hero)
When we’re off doing more adventurous stuff — kayaking, snorkelling, scrambling over rocks, we need travel photography gear that’s waterproof and can handle a few knocks. For that, we’ve been using the GoPro Hero 8.
Now, being completely honest? The photo quality isn’t great. The video is decent enough for YouTube or an Instagram Reel, but we don’t reach for it all that often anymore. It’s kind of become a relic at the bottom of the backpack.
Since the Hero 8 isn’t easy to get hold of anymore, we’d recommend the newer GoPro Hero (the standard model, not the maxed-out version). It’s less expensive, takes good-quality video, and the photos are perfectly fine when you’re in a pinch.

So if you need something rugged for wet or wild environments, this one’s a solid backup, just don’t expect it to replace your main setup.
📸 FREE Guide – 11 Simple Tips To Elevate Your Travel Photos
✅ Designed to help anyone take better travel photos, with no technical jargon, no confusing settings, and no need for fancy gear.
🎉 Simple, practical tips to take better photos – whether you’re using a camera or your phone!
Lenses for Travel Photography
If you’ve got a full-frame camera, you’ll need lenses to match, and unfortunately, they’re not cheap. But here’s the thing.. a good lens can last over a decade.
Lenses are the second most important part of your travel photography equipment. Invest wisely, and they’ll serve you for years.
For travel photography, we recommend using what’s often called “the holy trinity” of lenses, a trio of zoom lenses that cover all the focal lengths you’ll need day to day.
Standard Zoom Lens: 24–70mm f/2.8
A standard zoom lens (usually 24–70mm) is an essential piece of travel photography gear and versatile enough for most everyday shots.
If possible, go for one with a fixed f/2.8 aperture for sharp details and beautiful background blur, great for portraits and food shots.
We use the Sony G Master 24–70mm f/2.8, it’s been our favourite for years. Though ours is the original, we’re eyeing the lighter, updated version for easier travel.

On a budget? The Tamron 28–75mm f/2.8 is a great alternative. It’s not as wide or sharp, but for about a third of the price, it’s an excellent beginner travel photography lens.

Telephoto Zoom Lens: 70–200mm (or close enough)
When your subject is far away, whether it’s wildlife, mountains or street scenes, a telephoto zoom lens is essential. Most people choose a 70 to 200mm lens.
We use the Tamron 70 to 180mm f/2.8 instead. It’s lighter, more affordable, and still delivers sharp shots with beautiful background blur. Its compact size makes it perfect for anyone trying to pack the best travel photography gear into a carry-on.

Its compact size makes it easy to carry all day, and the constant f/2.8 aperture is great for low light and subject separation. On a budget? An f/4.0 version is still a solid choice for travel photography.
Ultra-Wide Zoom Lens: 16–35mm
This one’s an absolute favourite of ours. We adore landscape photography, and having an ultra-wide lens means we can capture sweeping scenes with all the detail and drama they deserve.
A wide-angle lens like this lets you fit more into the frame — perfect for mountain ranges, waterfalls, and big skies. And because we’re usually shooting with it on a tripod, we don’t need a super fast aperture.
That’s why we use the Sony Vario-Tessar 16–35mm f/4. It’s sharp, reliable and very lightweight (can you see a theme here?). If landscapes are your thing, this lens will elevate your shots instantly.

A lightweight Tripod
As you might’ve guessed from our intro, we’ve had a bit of a journey with tripods. The first one was cheap and cheerful, until it snapped a few months in.
The second was rock-solid but far too heavy to lug around on daily hikes. It was great… right up until our backs said otherwise.

The best travel tripod should be lightweight, durable and have a small footprint while packed away. Eventually, we found the sweet spot with the Calumet CK8204 Carbon Fibre Travel Tripod and Ball Head.
Lightweight, sturdy, and surprisingly durable.
It’s been dropped, dunked and shoved into bags more times than we can count, and it’s still going strong. But do have to compromise on how high you can get the camera as the legs are shorter on travel tripods.
The only other catch? It’s now really hard to find. We haven’t seen it available for sale in ages.
So if you’re looking for the best travel tripod for photography, we recommend the Benro Slim Travel FSL09CN00 Carbon Fibre Tripod with N00 Head.
It’s the same weight as our Calumet and comes in at a similar price point. We used to own a brilliant Benro tripod and can vouch for their build quality. It strikes the perfect balance for a lightweight travel photography kit, offering stability without the bulk.

Would you like to connect with other photographers who share your passion?
✨ Exclusive content on finding beautiful photography locations – how to get there, the best times to visit, and what shots to capture!
✨ Tips, advice and tailored support on photography gear and techniques!
✨ Inside information on the best photo spots in specific locations to help you plan your next trip!
✨ Connecting with other Travel Photography lovers!
Drone for those epic shots
Drones have become a big part of our travel photography gear, there’s just nothing like that aerial perspective for showing off a landscape in all its glory.

We use the DJI Mavic 3 Classic, which has served us incredibly well… but, in typical DJI fashion, it’s no longer sold. Sigh.
The good news? The natural successor is the DJI Mavic 3 Pro, and it’s even better.

The Mavic 3 Pro comes with two separate zoom cameras. The 3x zoom is genuinely impressive for stills, and we’d love to have that flexibility in our setup. The 7x zoom isn’t as sharp, but it’s handy for scouting compositions.
The only real downside? The drone weighs 1kg.. It’s a bit of a lump to carry, but for the kind of image quality we want in our camera gear for travel, it’s worth it.

If you’re after something more travel-friendly, we’d point you to the Mavic Mini 4 Pro. It’s much smaller, way lighter, and still produces great photos, especially if you don’t mind giving up a bit of sharpness and dynamic range.
For most beginners and casual travel photographers, it’ll more than do the job.

And we’ve got our eye on the future, too. The Mavic 4 Pro is now available, and we’re very excited. Why?
They’ve finally built a big-sensor drone that shoots vertically which is ideal for framing social-media-sized shots without cropping. We’re sure it’ll be packed with new features, but that vertical shooting option alone is a game-changer for us.

Filters
If you’re serious about travel photography gear, filters are a must. They help you control light, add creative effects, and most importantly, protect your lenses from the elements.
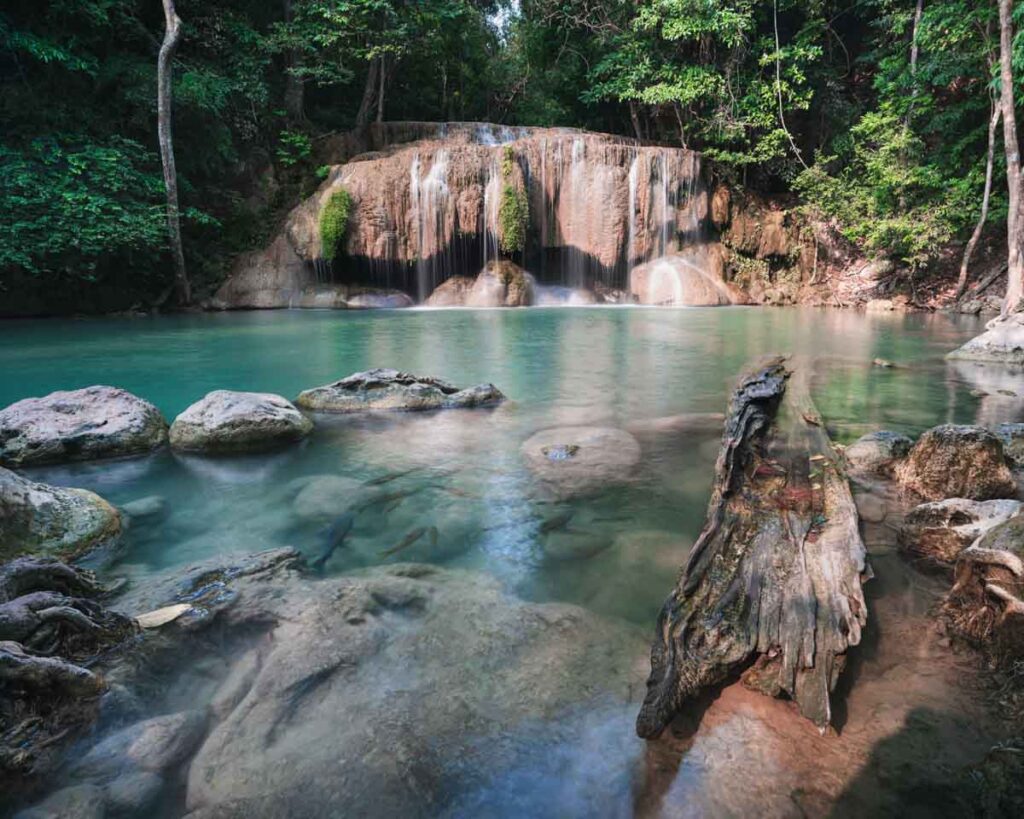
Sony A7R3 – Camera Settings – ISO-100, 16mm, f/8, 0.5sec
We shoot in all kinds of weather, and our gear goes through a lot. So we tend to use inexpensive filters, partly because they do the job, but mostly because we’re not heartbroken if we scratch or drop one mid-hike.
Here’s what we carry:
- Hoya UV Filter
This one’s mainly for protection. It doesn’t change the image much, but it acts as a barrier between your expensive lens and the outside world. If something’s going to get scratched, we’d rather it be a £29 filter than a £1,800 lens. - Hoya Polarising Filter
This is where things start to get creative. A polariser cuts glare, especially on water or shiny surfaces, and adds richer colours and more contrast. You know those photos where you can see the rocks clearly beneath the surface of a stream? That’s the polariser at work. - Kentfaith Variable ND Filters (Neutral Density)
Think of these as sunglasses for your camera. They block light so you can slow your shutter speed even in bright conditions. That’s how you get those smooth, flowing waterfalls or blurred motion in busy scenes without overexposing the shot. We like the variable ND filters because we can just screw it on and adjust for the light accordingly instead of faffing around with multiple filters.
📸FREE Photography Guide
Want to take your photography skills to the next level?
Download our FREE photography planning guide! It’s packed with 8 simple location tips to help you capture breathtaking photos, no matter your skill level.
Simply enter your details below, and we’ll send you the guide along with additional tips and tricks to inspire your photography journey. Whether you’re a beginner or looking to refine your craft, this guide will set you up for success.
Download our FREE guide below👇
Backpack and Storage for you travel photography gear
Over the years, we’ve tested almost every type of travel photography backpack. And I’ll be honest with you, I’m still chasing the perfect one.
Every type we’ve used has its pros and cons, and what works really depends on your style of travel and how much gear you’re carrying.
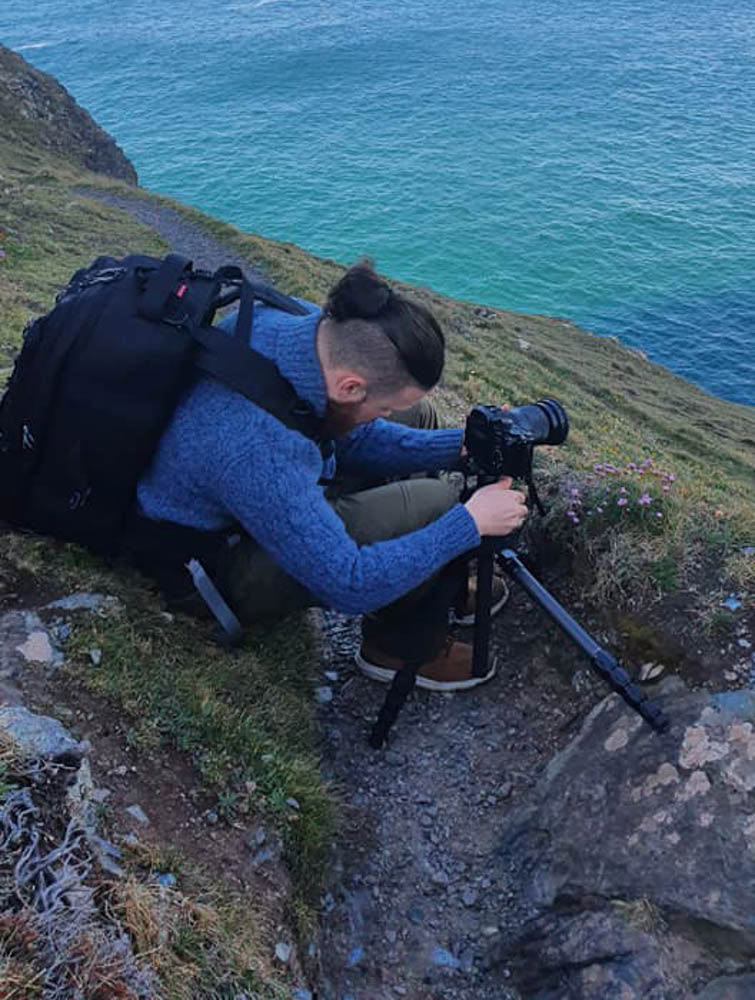
Here are a few we’ve tried (and what we think of them):👇
Lowepro Flipside BP 400 AW III
The Lowepro Flipside BP 400 was my main bag for a couple of years, and it’s brilliant. Super comfy, well-padded, and packed with thoughtful details, loads of dividers, pockets, and room for pretty much everything.
If you’re after a backpack that keeps your kit protected and organised, this one’s a strong contender.
The only issue? All the padding that makes it comfortable makes the bag itself quite heavy. At 1.7kg empty, it became a bit much when we were trying to pack light for travel.

Vanguard Divider Bag (used in an Osprey Backpack)
When I was given an Osprey backpack to travel with, I realised how practical it was for fitting more than just camera gear.
To keep the camera safe inside, I used the Vanguard Divider Bag 46. It’s great for protecting lenses and bodies while you’re on the move, but it’s a bit too bulky and awkward for day hikes.
For use inside luggage, though? It does the job well.

LensCoat Lens Pouch
And for day hikes? Honestly… I just went rogue.
I used a regular backpack and kept my camera and lenses in neoprene pouches like the LensCoat Lens Pouch.
Was it the smartest solution? Maybe not.
It doesn’t offer a lot of protection if you drop your bag, but it’s incredibly lightweight and keeps things simple. If you’re someone who prefers minimalist travel photography gear, this kind of setup keeps things light and fuss-free.

12 Must-Have Travel Photography Accessories
It’s often the little bits of travel photography gear that make your life easier and our workflow smoother.
Unfortunately the cost of all the accessories can really start racking up. But these items make a huge difference in how easy life will be on the road.
Here are the accessories we actually carry, and actually use:
1. L Bracket
If you shoot for Instagram like we do, or any other platform that favours vertical framing, you’ll want a way to mount your camera vertically on a tripod. That’s where an L bracket comes in. It’s basically a standard tripod plate with an extra arm, shaped like an L, so you can flip your camera from horizontal to vertical. Simple, effective and once you’ve used one, you won’t go back.
2. Filter Pouch
This is something I only picked up recently, but it’s already made life so much easier. No more fumbling around with loads of individual plastic cases or digging through my bag to find the right filter. Now they’re all snug and organised in one place, ready to go when I need them. It’s a small change that’s had a big impact on how quickly I can set up a shot.
3. Remote Shutter Release
If you want to take photos of yourself or get into long exposure photography, it’s well worth investing in a shutter release. It helps you avoid camera shake and gives you more control over timing, especially useful when you’re shooting things like light trails or waterfalls. It’s not essential because you can get around it with self-timers or phone apps. But there have definitely been moments I’ve missed mine when I forgot to pack it that day.
👉 Get a remote shutter release here
4. Peak Design Camera Clip
Now I love this thing. When I’m wearing a backpack and know I’ll be using my camera a lot, I just attach the clip to the shoulder strap and slide my camera in and out of it as I go. It keeps the camera secure but instantly accessible which is perfect for spontaneous shots. I wouldn’t use it for a full-day hike or a long trek, but for a couple of hours out and about when I want the camera close to hand its perfect. It’s pricey but worth the investment.
👉 Check out the Peak design camera clip here
5. Small Rig Folding Multi-Tool Kit
There’s nothing more frustrating than needing to take off your L bracket and realising you’ve lost the allen key. Or wanting to attach a new accessory and not having the right tool for it. That’s why I keep a multi-tool in my bag at all times. It’s purely for camera gear, so I never forget it. Doesn’t take up much space, but it’s saved me a lot of hassle over the years. I’ve even gone so far as to clip it to my bag so I can’t just put it down and lose it.
👉 Check out the Small Rig Folding multi tool
6. Lens Cloth
When you’re shooting near waterfalls or get caught in a bit of rain, you’ll need something to wipe down your lens. And no, your t-shirt doesn’t count. A proper lens cloth makes sure you’re actually cleaning the glass, not smearing it with sweat or dust. It sounds basic, but it’s one of those small things that can make a difference.
7. Zeiss Lens Cleaning Kit
I’ll be honest, I should definitely use mine more often. But every time I do, I’m so glad I made the effort. It’s amazing how much grime builds up on your lenses over time, especially when you’re out in the elements. A simple kit with some glass cleaning fluid, microfibre cloths, and lens wipes can make a real difference to the sharpness and clarity of your images. Totally worth having in your bag. The blower that comes with this kit isn’t great so I suggest getting something with more errr… blow.
👉Get your lens cleaning kit here
8. Rocket Blower
If you’ve ever noticed mysterious little black spots on your photos, especially in bright skies, chances are you’ve got dust on your sensor. It’s a common issue when swapping lenses out in the field. A rocket blower is a simple, low-impact tool that blasts a puff of air onto the sensor to safely dislodge dust. I really wish I’d known about it sooner. Years ago, I tried to clean my sensor with a bit of tissue… and that decision cost me £600. The camera was ruined. Don’t be like past me.. get a rocket blower.
9. Charger
When you’re out and about with a full kit of cameras, drone and phones, you’ll need a way to keep everything topped up. I use a charger with a 120W total output, which means it can charge multiple high-power batteries quickly and at the same time. It’s ideal for travel when you’ve only got one plug socket in a guesthouse or hostel. With this kind of setup, you’ll wake up to everything fully charged and ready to shoot. Unfortunately, the high-power chargers are expensive but I would buy mine over and over to make sure everything charges quickly and reliably.
10. Power Bank
Sometimes your travel photography gear runs out of battery halfway through the day, especially if you’re using it a lot for shooting or navigating. That’s why we always pack a solid 26,000mAh power bank. It’s got enough juice to keep cameras, phones and even a drone battery going. We made sure to get one with a 60W output, which means it can charge our drone battery in about an hour. Way more affordable than buying a second drone battery, Right?
11. SD Cards
We use a bunch of smaller SD cards instead of relying on one big one. That way, if something goes wrong, you don’t lose everything. We learnt this the hard way in Barcelona, when our 1TB card decided to eat all our photos and never worked again. It’s a small change, but it massively reduces the risk of losing a whole trip’s worth of memories. For high-speed burst photo modes you will need to use a UHS II memory card which are more expensive but allow you to freeze the frame in high speed shots.
12. Hard Drives
Fun fact (and yet another painful lesson learned): SSD drives are nearly impossible to recover data from if they fail. Old-school HDDs? Much easier to save. After losing another batch of photos in Malaysia, we now use an SSD for day-to-day work because of the faster speeds, but everything gets backed up on a good ol’ trusty HDD. We’re big fans of the LaCie Rugged HDDs. They’ve got a spongy orange casing, so we don’t even bother with an extra case. Durable, reliable, and they’ve been reliable throughout our travels. 👉 Check out hard drives here
Wrapping It Up: What to Do Next
We get it, planning a trip is already enough of a challenge without having to second-guess your kit list too. Wherever you’re headed next, having a solid travel photography setup can make all the difference.
This guide is packed with the essential travel photography gear we’ve personally used, tested and relied on through the years.
From our favourite full-frame camera to the little lens cloth that’s saved more than one rainy-day shoot, every item here has earned its place in our backpacks. Wherever you’re headed next, having a solid travel photography setup can make all the difference
Ready for the next step? Check out our blog on how to find photography spots.
It’ll help you plan your trip around amazing locations and get the most out of all this travel photography gear you’ve just packed.
Love capturing photos while you travel? ✈️📸
Check out my Travel Photography series for easy tips and tricks to help you take stunning shots on the go! I cover everything you need to know to improve your photography while exploring the world.
Tips to elevate your photography
- Mastering What Shutter Speed to Use for Perfect Shots
- Must Have Travel Photography Gear for Your Next Adventure
- How To Find Photography Spots: A Travel Photographers Guide
- When is the Best Time to Take Pictures Outside?
- Best Lens for Travel Photography: What to Pack and Why
- 17 Photography Composition Techniques for Top Travel Photos
- Understanding Aperture: Examples & Photos for Beginners
- Practical Tips to Elevate Your Photography on a Cloudy Day
- 21 Tips for Photographing Mountains
- Ultimate Guide to Perfecting Waterfall Photography
- What is Travel Photography? Start your adventure today!
- 11 Types of Travel Photography Every Traveller Should Explore
- 16 Game-Changing Tips on Travel Photography
- Beginners Guide To Photographing People While Travelling
